
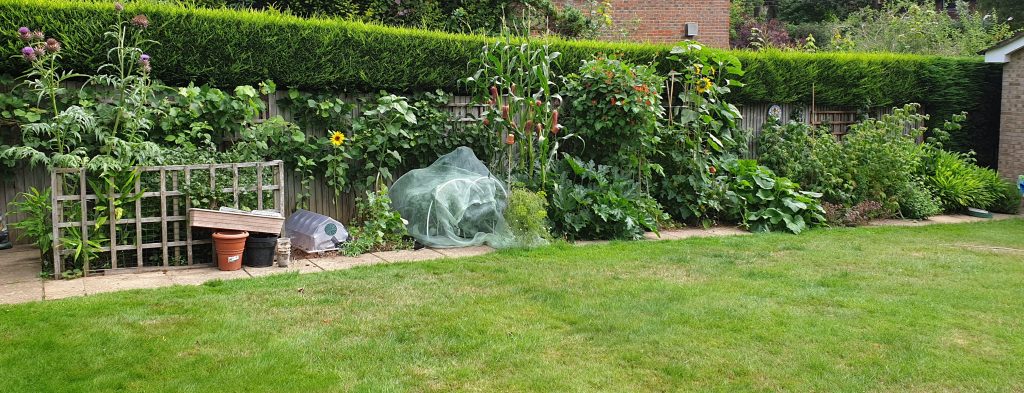
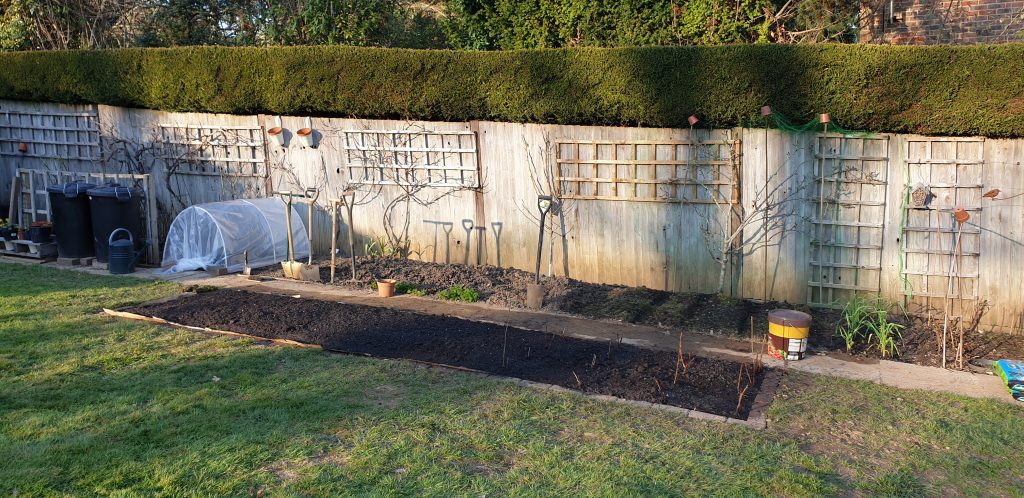
My wife, Akiko, is a keen gardener. Most years she grows between 40 and 50 different varieties of fruit and vegetables in a long, narrow plot (pictured below) in our garden.
The plot gets a lot of sun. From Spring, right through to the start of Winter, we enjoy eating the fresh fruit and vegetables she cultivates. As the growing season progresses, we always have lots to give away to family and friends.
Akiko’s been wanting to expand our growing space for some time but until now we couldn’t figure out how best to do this. Because our garden is on a slope, raised beds don’t work too well, so we needed to find another approach. Last week, with the days lengthening and the weather warming up, we took the plunge and decided to sacrifice part of our lawn and turn this into a new vegetable plot.
For anyone interested in converting some of their lawn into new growing space, here’s a step-by-step guide on how Akiko did this. There are actually simpler ways to do it, requiring no digging, but here is the method she used:
Step 1 – Choose a Good Spot
Probably the most important thing to consider, as you think about where you want your new vegetable plot to be, is how much sun it will get. The more hours of sun the better. We decided to locate ours adjacent to the existing one, as this part of the garden gets the sun for most of the day. We also know that the soil should be suitable for growing a good variety of fruits and veg.
Step 2 – Mark Out the New Plot
To mark out the plot boundary, Akiko used a length of string and some long nails (see pic).
Step 3 – Cut the New Border Edge Into the Turf
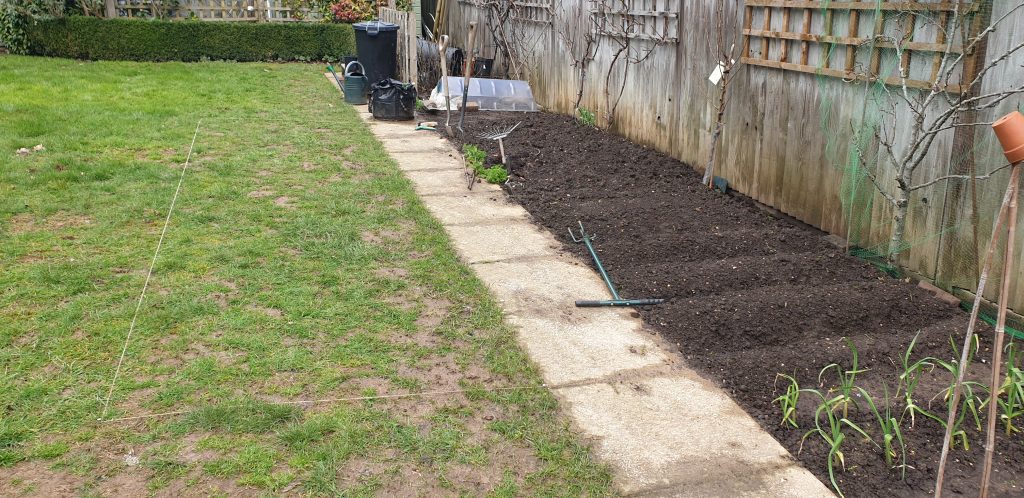
Using a lawn edge iron this step was easy as the turf in mid-March was still quite wet. With the new border line marked out it’s just a matter of following the string and keeping straight lines.
Step 4 – Remove Turf and Dig Over
We did this in rows and sections, removing about 4 inches of turf at a time in approximately 1ft. x 1ft. chunks. We relocated about 10 wheelbarrow loads of turf from around the edges of the new plot, turning the sods of turf upside down and scattering them under established hedges elsewhere in the garden.
For the sods of turf that remained, we turned them over with spades and broke them up, gradually separating the grass from the soil, turning it over again and again to mix it into the soil below. This was the most physically demanding part of the project. (Note: you don’t actually HAVE to remove the turf layer – this is just the way that Akiko opted to do it after lots of research. Her method should give the best opportunity for the new planted crops to flourish).
Step 5 – Sieve the Soil
Using a soil sieve, Akiko spent about an hour removing all the stones she found in the soil. This will ensure that what is going to be planted there will encounter fewer obstacles.
Step 6 – Add Bricks Along the Border Edge
This step is not really a necessity, but as we had some old bricks lying around in the garden, Akiko decided to line the edges of the new plot with them. It just means the new plot looks a bit neater and there is a boundary between the lawn and the veg plot. This should make lawn edging a bit easier in the future.
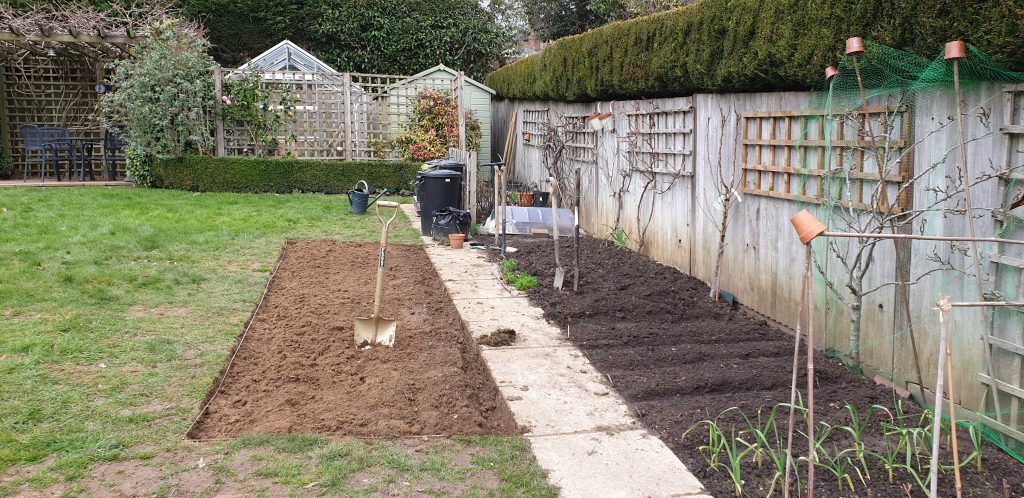
Step 7 – Cover the Whole Plot With a Layer of Cardboard
Akiko collected a few plain old cardboard boxes from local supermarkets, then flattened them out and laid them across the entire newly-dug plot. It’s important to remove any sticky labels or packing-tape from the boxes.
The layer of cardboard is a “green” solution which suppresses weed growth. As the cardboard breaks down over time, it makes sugar, and this will hopefully attract earthworms to improve the soil. It is important to wet the cardboard thoroughly with a garden hose as this will hasten its natural decomposition.
Step 8 – Spread the Compost
With the cardboard down, Akiko then covered the whole plot with a generous layer of good quality vegetable compost. This means that the new growing area now sits slightly proud of the lawn. She used six 50 litre bags of Westland peat-free New Horizon All Veg Compost on the plot. This is good stuff.

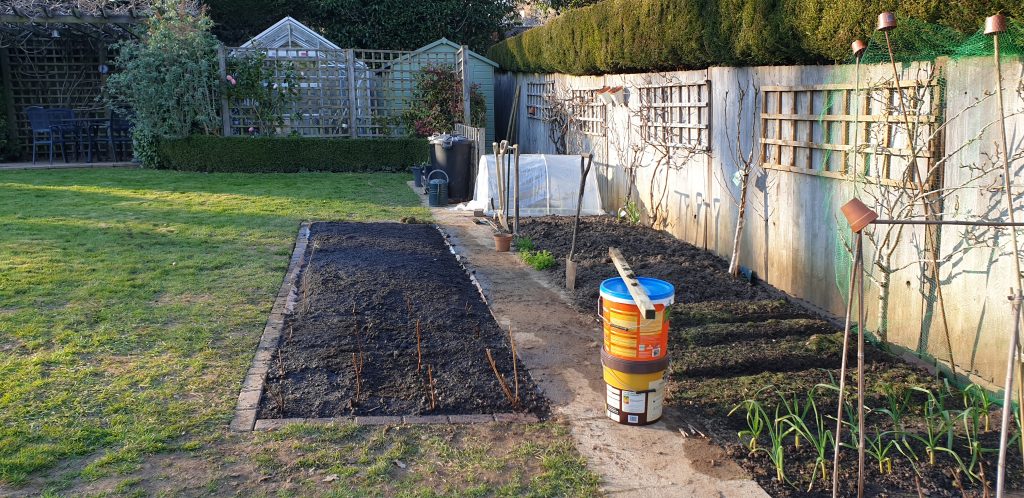
Step 9 – Start Planting!
In the pic above you may notice that Akiko has already started planting. 16 raspberry plants which had been growing in pots were the first things to go in. As soon as the chance of frost recedes, she’ll start planting out in the rest of the plot. The planting will involve a mixture of seeds from packets and seedlings currently being cultivated in pots and containers in the greenhouse.
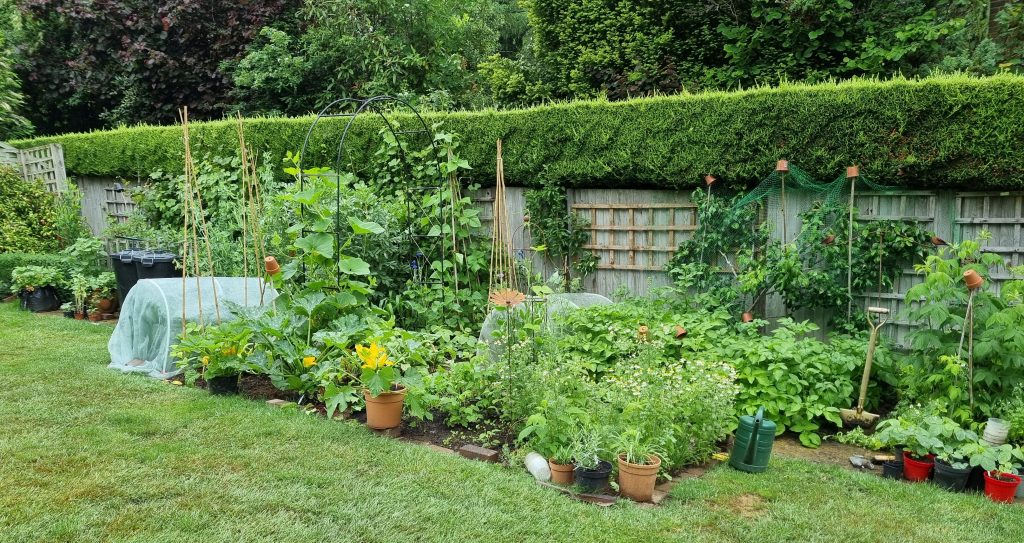
Mid-June Update
What a difference 3 months makes! Look at how the new vegetable plot has flourished in the picture below.
Cost of the Project
- All done for just £36, which was the cost of the compost.
Items You’ll Need
- String
- Long nails (or pegs)
- Garden spade
- Lawn edge iron
- Wheelbarrow
- Cardboard
- Soil sieve
- Bricks (optional)
- Compost
- Garden hose (or watering can)
To read our post about how to create a Japanese garden, please click here.